
7 Best DIY Golf Simulator Kits and Parts for 2026
We compared 7 real DIY golf simulator kits and parts from $63 to $1,000 on space, accuracy, setup and value to help you build a home sim that fits your budget.

Building a DIY golf simulator means assembling the right parts rather than buying one box, and the pieces you choose decide how good, how safe and how affordable the finished bay turns out. This guide compares seven real, widely owned components and kits, from a $63 conduit corner set to a near-$1,000 branded enclosure, covering every layer of a home build: the enclosure and screen that catch the ball and show the picture, the launch monitor that supplies the data and course play, the mat you hit off and the compact cage that fits a tight room. We weighed each on how much of the job it does for you, the space it needs, build effort, durability and value for money. Whether you want the enclosure decision made in one purchase, the data brain that turns a screen into a real simulator, or the cheapest possible frame you cut yourself, one of these picks fits your room and budget. Below you will find the best overall kit plus category winners for the launch monitor, premium enclosure, mat, screen, scratch builds and compact setups, followed by a plain buying guide.
Table of contents
- Quick picks
- Price compared
- Comparison table
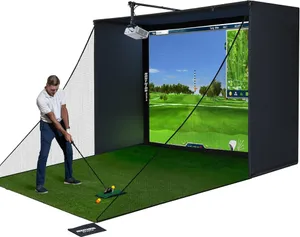
- Best Overall: Complete Golf Simulator Enclosure Package
- Best Launch Monitor: Rapsodo MLM2PRO
- Best Premium Enclosure: GoSports Golf Simulator Enclosure
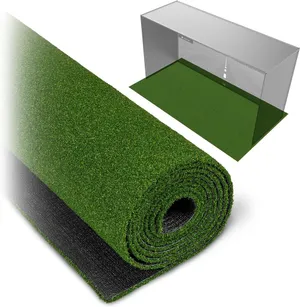
- Best Hitting Mat: GoSports Golf Simulator Turf
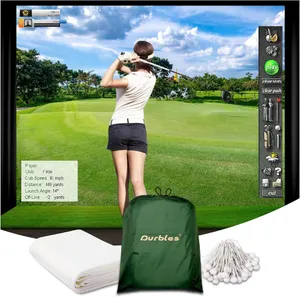
- Best Impact Screen: Durbles Golf Simulator Impact Screen
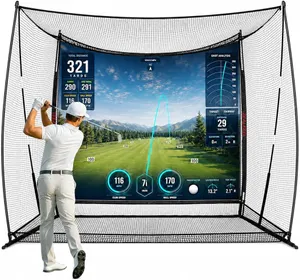
- Best Compact Setup: ZEALFEEL Golf Simulator Cage
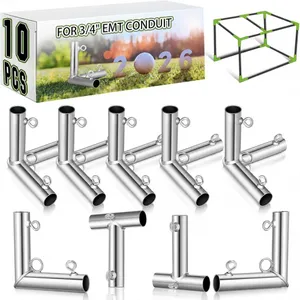
- Best for Scratch Builds: Blulu Golf Frame Corner Kit
- How we researched these picks
- How to choose a DIY golf simulator (buying guide)
- FAQ
Quick picks
Every pick wins a specific use case. Jump to the full review before you buy.
-
Best Overall
Complete Golf Simulator Enclosure Package
This kit hands you the hardest parts of a DIY build in one box, a 4K-ready impact screen, blackout cage and frame poles, so you only need to add a launch monitor, projector and mat to have a working sim.
-
Best Launch Monitor
Rapsodo MLM2PRO
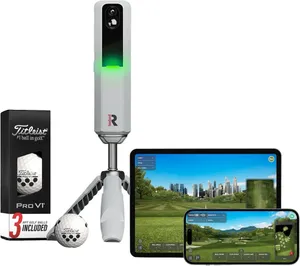
The MLM2PRO is the data brain most DIY builds are missing, a dual-camera and radar unit that reads 15 metrics and plays virtual courses, all from a device that sits on the mat and pairs with your phone.
-
Best Premium Enclosure
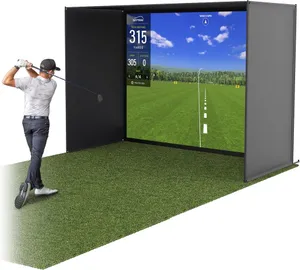
GoSports Golf Simulator Enclosure
GoSports brings a known brand, a sturdier frame and multiple size options to the enclosure job, making it the pick when you want a bigger, more durable bay and are willing to pay a little more for it.
-
Best Hitting Mat
GoSports Golf Simulator Turf
A 15 mm elite turf mat is the surface your DIY sim actually lives on, and this GoSports mat pairs a forgiving feel with the highest owner rating in this lineup at a genuinely affordable price.
-
Best Impact Screen
Durbles Golf Simulator Impact Screen
If you are framing your own enclosure, this triple-layer screen is the projection surface to hang on it, delivering sharp HD visuals and a strong owner rating for a fraction of a full enclosure kit.
-
Best Compact Setup
ZEALFEEL Golf Simulator Cage
This 10x8 cage bundles a steel frame, side barriers and a dual-layer impact screen for around $200, the fastest low-cost way to get a contained hitting bay into a small room.
-
Best for Scratch Builds
Blulu Golf Frame Corner Kit
For the true DIY builder, this 10-piece corner kit turns cheap hardware-store conduit into a square, rigid 10-foot cage frame, the lowest-cost way to build an enclosure from the ground up.
Compare every pick
| Product | Award | Component | Setup | Price | Warranty | Best for | Where to buy |
|---|---|---|---|---|---|---|---|
| Complete Golf Simulator Enclosure Package | Best Overall | Enclosure, screen and cage | About 45 minutes | $800 | 1 year | Builders who want the enclosure sorted in one purchase and will add their own tech | Check price on Amazon for Complete Golf Simulator Enclosure Package at Amazon (affiliate link) |
| Rapsodo MLM2PRO | Best Launch Monitor | Launch monitor | About 5 minutes | $600 | 1 year | Builders who want real shot data and course play to drive their DIY screen | Check price on Amazon for Rapsodo MLM2PRO at Amazon (affiliate link) |
| GoSports Golf Simulator Enclosure | Best Premium Enclosure | Enclosure, screen and frame | About 1 hour | $1,000 | 1 year | Builders who want a larger, brand-backed bay and room-size options | Check price on Amazon for GoSports Golf Simulator Enclosure at Amazon (affiliate link) |
| GoSports Golf Simulator Turf | Best Hitting Mat | Hitting mat | Roll out, ready | $180 | 1 year | Builders who want a comfortable, durable surface to hit and stand on | Check price on Amazon for GoSports Golf Simulator Turf at Amazon (affiliate link) |
| Durbles Golf Simulator Impact Screen | Best Impact Screen | Impact screen | About 20 minutes | $160 | 1 year | Builders framing their own enclosure who just need a durable screen | Check price on Amazon for Durbles Golf Simulator Impact Screen at Amazon (affiliate link) |
| ZEALFEEL Golf Simulator Cage | Best Compact Setup | Net cage and screen | About 40 minutes | $200 | 1 year | Budget builders with a small room who want containment fast | Check price on Amazon for ZEALFEEL Golf Simulator Cage at Amazon (affiliate link) |
| Blulu Golf Frame Corner Kit | Best for Scratch Builds | Frame fittings (10 pieces) | DIY assembly | $63 | None stated | Hands-on builders who want to size and build a frame from raw conduit | Check price on Amazon for Blulu Golf Frame Corner Kit at Amazon (affiliate link) |
Swipe sideways to compare every column.
Best Overall
Complete Golf Simulator Enclosure Package
by Complete Golf Simulator
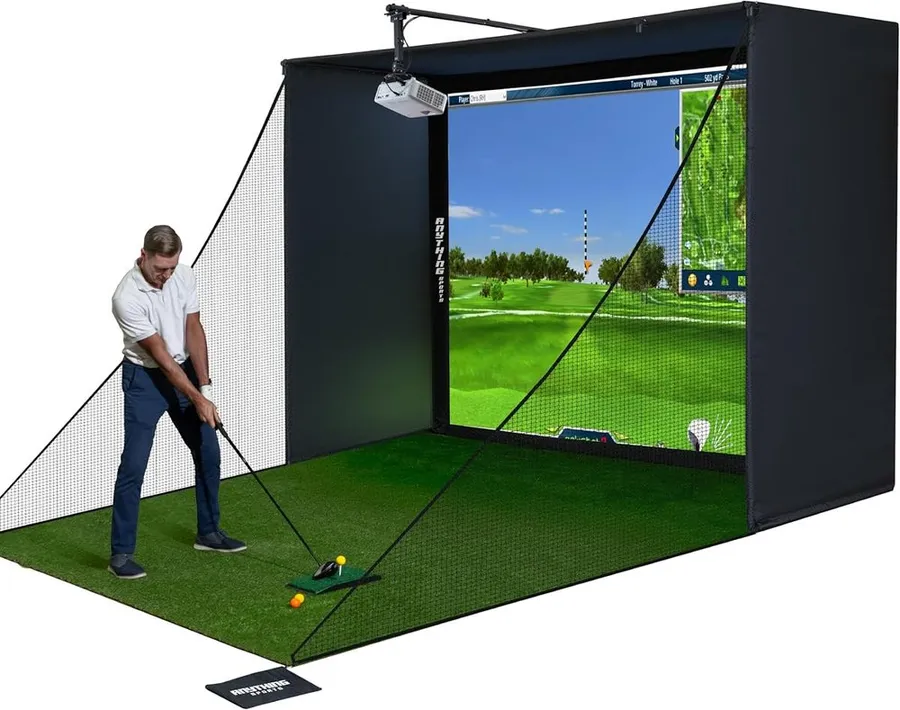
This kit hands you the hardest parts of a DIY build in one box, a 4K-ready impact screen, blackout cage and frame poles, so you only need to add a launch monitor, projector and mat to have a working sim.
What we like
- Screen, cage and frame poles arrive together, so there is no sourcing or guesswork
- 4K-ready impact surface with a blackout cage keeps projected images bright
- Strong owner rating across a large review base for a build-it-yourself kit
- Priced well below a full turnkey studio package
What we don't
- It is only the shell, so you still have to buy and budget for a launch monitor, projector and mat
| Component | Enclosure, screen and cage |
|---|---|
| Best for | An easy all-in-one build |
| Setup | About 45 minutes |
| Price | $800 |
| Warranty | 1 year |
| Install difficulty | Moderate |
| Price bracket | $$ |
This enclosure package wins Best Overall because it removes the part of a DIY build that trips people up: the enclosure itself. Sourcing an impact screen that can survive a driver, a blackout cage that keeps stray shots contained and a frame that holds it all square is where home projects stall. Buying them as one matched kit skips all of that.
What you get is a 4K-ready impact screen, a blackout surround and the frame poles to hang them, so the space is ready for a projector image as soon as it is assembled. Setup runs around three quarters of an hour with two people, and the large, positive owner review base is reassuring for a category full of unknown brands.
The honest limit is that this is a shell, not a system. There are no electronics inside it, so you still need a launch monitor to read your shots, a projector to throw the image and a mat to hit off. Factor those into your budget before you compare it against pricier all-in-one studios.
Choose this if you want the enclosure decision made for you and you are happy to pair it with tech you pick yourself. If you would rather everything arrive in one box and play courses immediately, look at a turnkey studio package instead, and pay a lot more for the convenience.
Research-based pick: this recommendation is based on product data, owner feedback and comparison with products we have tested, not on direct hands-on testing.
Buy it if: Builders who want the enclosure sorted in one purchase and will add their own tech
Skip it if: You want a complete system that plays courses out of the box with nothing else to buy
Best Launch Monitor
Rapsodo MLM2PRO
by Rapsodo
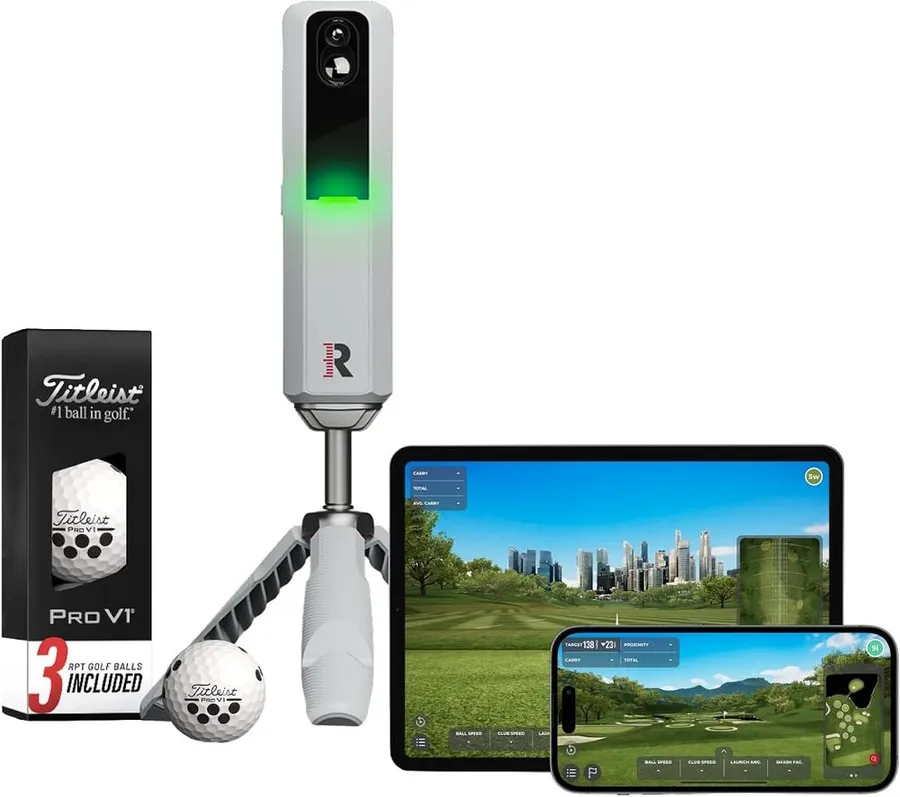
The MLM2PRO is the data brain most DIY builds are missing, a dual-camera and radar unit that reads 15 metrics and plays virtual courses, all from a device that sits on the mat and pairs with your phone.
What we like
- Dual camera and radar reads 15 metrics including club and ball data
- Plays virtual courses and range sessions through the Rapsodo app
- Comes with three Pro V1 balls and works indoors or at the range
- Sets up in about five minutes with no wiring into your enclosure
What we don't
- Full metrics and course play sit behind a paid annual membership after the first year
| Component | Launch monitor |
|---|---|
| Best for | Shot data and course play |
| Setup | About 5 minutes |
| Price | $600 |
| Warranty | 1 year |
| Install difficulty | Easy |
| Price bracket | $$ |
A DIY enclosure is just a screen until something feeds it a picture and a score, which is why the MLM2PRO earns Best Launch Monitor here. It is the piece that turns a frame and a screen into an actual simulator, reading ball and club data with a combination of dual cameras and radar and then rendering it as course play or a practice range on your phone or tablet.
Day to day it is the easy part of the whole project. The unit sits on the mat a set distance behind the ball, pairs over the app in a few minutes and needs no permanent wiring into your build. It ships with three premium balls, and the same device works out at the range when you want to escape the garage.
The real catch is the subscription. The headline price gets you the hardware and a first year, but the richest metrics and the course library move behind a paid annual membership after that, so budget for the recurring fee rather than treating the sticker as the final cost.
Pair this with an enclosure, projector and mat and you have a complete DIY simulator that plays real courses. If your goal is only to groove a swing into a net, you do not need this level of data, and a cheaper cage on its own will do.
Research-based pick: this recommendation is based on product data, owner feedback and comparison with products we have tested, not on direct hands-on testing.
Buy it if: Builders who want real shot data and course play to drive their DIY screen
Skip it if: You only want a net to hit into and do not care about measured numbers
Best Premium Enclosure
GoSports Golf Simulator Enclosure
by GoSports
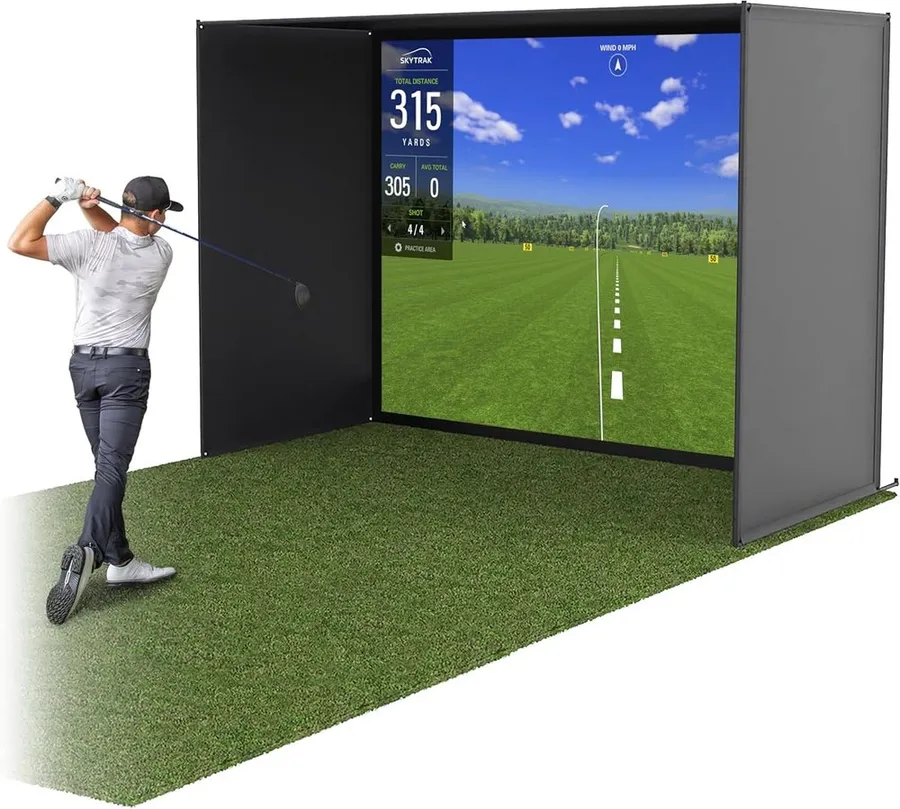
GoSports brings a known brand, a sturdier frame and multiple size options to the enclosure job, making it the pick when you want a bigger, more durable bay and are willing to pay a little more for it.
What we like
- Recognized brand with a reassuring rating over a large review base
- Choice of 10x8, 12x9 or 14x8 sizes to match your room
- Complete set with frame and an HD impact screen kit
- Heavier frame and netting suit frequent, harder hitting
What we don't
- Costs more than budget enclosure kits while still needing your own launch monitor and projector
| Component | Enclosure, screen and frame |
|---|---|
| Best for | A larger, sturdier bay |
| Setup | About 1 hour |
| Price | $1,000 |
| Warranty | 1 year |
| Install difficulty | Moderate |
| Price bracket | $$$ |
The GoSports enclosure takes Best Premium Enclosure because it answers the two questions a budget kit leaves open: is the brand reliable and will it fit my room. It is a complete set with the frame and an HD impact screen kit, and it comes in three footprints so you can size the bay to a 10, 12 or 14 foot wide space rather than forcing your room to match the box.
In use it feels like the more grown-up option. The frame and netting are built to take repeated full swings, and the strong rating across a large owner base is exactly what you want before you bolt a cage together in your garage and start firing drivers at it.
The trade-off is money and, as with any enclosure, completeness. It sits above the cheapest kits on price, and it is still only the shell, so a launch monitor and projector remain your responsibility. You are paying for brand confidence, build quality and sizing flexibility rather than added electronics.
Pick this when you have the budget and the space to do the enclosure properly and want a name you recognize behind it. If your room is small or your wallet is tight, a compact cage or a lower-cost enclosure package makes more sense.
Research-based pick: this recommendation is based on product data, owner feedback and comparison with products we have tested, not on direct hands-on testing.
Buy it if: Builders who want a larger, brand-backed bay and room-size options
Skip it if: You are on a tight budget or have a small space that a compact cage would fill
Best Hitting Mat
GoSports Golf Simulator Turf
by GoSports
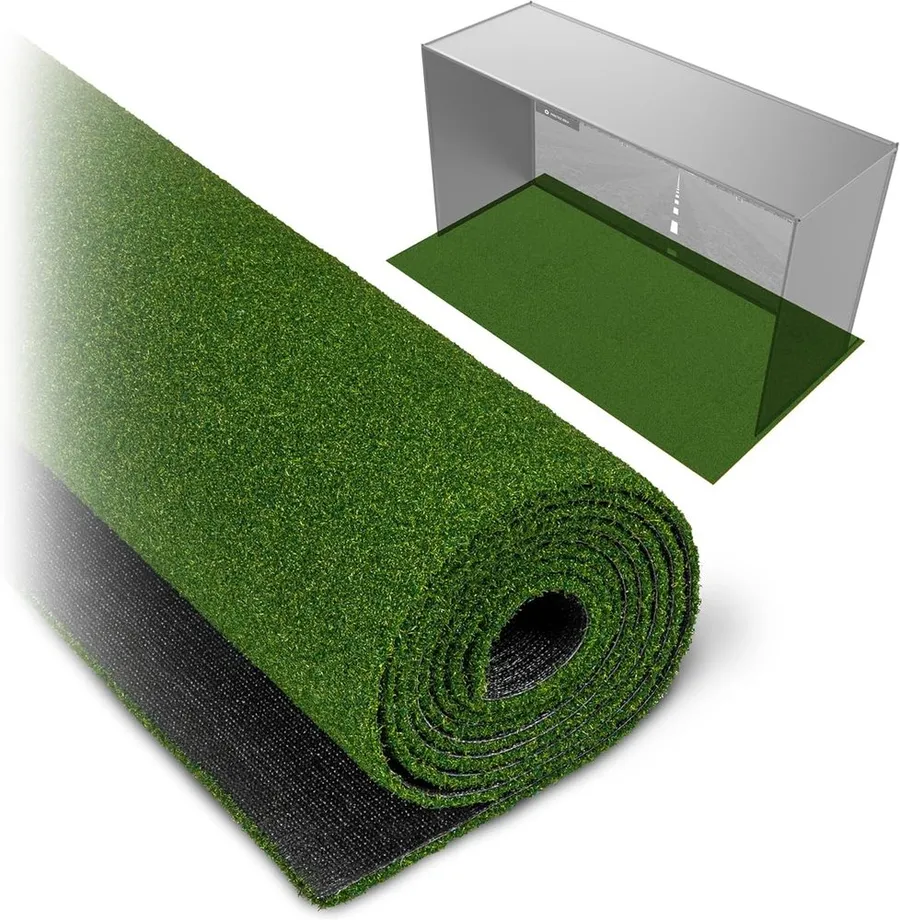
A 15 mm elite turf mat is the surface your DIY sim actually lives on, and this GoSports mat pairs a forgiving feel with the highest owner rating in this lineup at a genuinely affordable price.
What we like
- 15 mm elite turf gives a forgiving, close-to-real strike feel
- Highest owner rating in this guide across a solid review base
- Available in 10, 12 and 15 foot lengths to run the full stance area
- Rolls out ready with no assembly
What we don't
- A mat alone provides no shot data, screen or containment, so it is one piece of a larger build
| Component | Hitting mat |
|---|---|
| Best for | A forgiving stance and swing surface |
| Setup | Roll out, ready |
| Price | $180 |
| Warranty | 1 year |
| Install difficulty | Easy |
| Price bracket | $ |
The mat is the part of a DIY sim you feel on every swing, and this GoSports turf earns Best Hitting Mat by getting the fundamentals right. Its 15 mm elite surface is thick enough to give a forgiving, near-real strike feel and to protect your wrists and your floor, which matters when you are hitting hundreds of balls a week in a garage.
It is also the easiest purchase on this list. There is nothing to build: you unroll it and start hitting. The longer 12 and 15 foot options let you cover both the ball position and your stance in one continuous surface, so you are not standing on cold concrete beside a small square mat.
Its limitation is simply that it is a mat. It does not read your shots, throw an image or stop a ball, so on its own it is not a simulator. It is the foundation the rest of the build sits on rather than the centerpiece.
Buy this early in a DIY project and pair it with a launch monitor and an enclosure. Skip it only if you already own a good mat or if your first priority is containment and data rather than the surface underfoot.
Research-based pick: this recommendation is based on product data, owner feedback and comparison with products we have tested, not on direct hands-on testing.
Buy it if: Builders who want a comfortable, durable surface to hit and stand on
Skip it if: You already own a quality mat or need containment and data first
Best Impact Screen
Durbles Golf Simulator Impact Screen
by Durbles
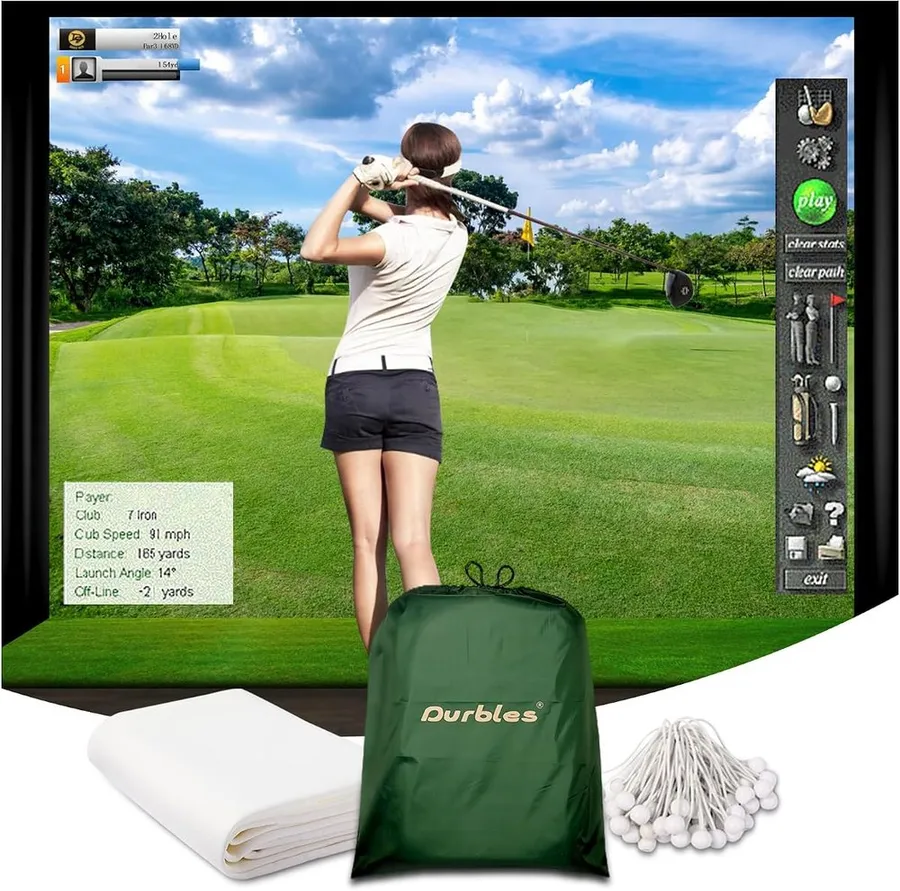
If you are framing your own enclosure, this triple-layer screen is the projection surface to hang on it, delivering sharp HD visuals and a strong owner rating for a fraction of a full enclosure kit.
What we like
- Triple-layer build absorbs driver impacts while staying quiet
- HD visuals give a bright, sharp projected image
- Ships with grommets and bungee cords for tensioning on a DIY frame
- Very well rated by owners at a low standalone price
What we don't
- You must supply your own frame and netting, since it is a screen only
| Component | Impact screen |
|---|---|
| Best for | Projecting on a DIY frame |
| Setup | About 20 minutes |
| Price | $160 |
| Warranty | 1 year |
| Install difficulty | Moderate |
| Price bracket | $ |
For the builder who is happy to make the frame but does not want to gamble on a screen, this Durbles panel earns Best Impact Screen. The projection surface is the one component you cannot cheap out on, because it takes the full force of every shot and still has to show a clean image, and a triple-layer screen is built exactly for that job.
Day to day it does two things well. It absorbs driver-speed impacts without the loud crack thinner screens make, and its HD surface throws a bright, sharp picture so your course play looks the part. The included grommets and bungee cords let you tension it evenly on your own frame, which is what keeps the image flat and wrinkle-free.
The obvious limitation is that this is a screen and nothing else. There is no cage, no frame and no side netting, so it assumes you are supplying the structure yourself, whether that is a conduit frame or a wall mount.
Choose this if you are already building or own the frame and only need a trustworthy surface to project onto. If you would rather not source poles and netting separately, a complete enclosure package that bundles the screen with a cage is the simpler route.
Research-based pick: this recommendation is based on product data, owner feedback and comparison with products we have tested, not on direct hands-on testing.
Buy it if: Builders framing their own enclosure who just need a durable screen
Skip it if: You want a full enclosure with a cage and frame included
Best Compact Setup
ZEALFEEL Golf Simulator Cage
by ZEALFEEL
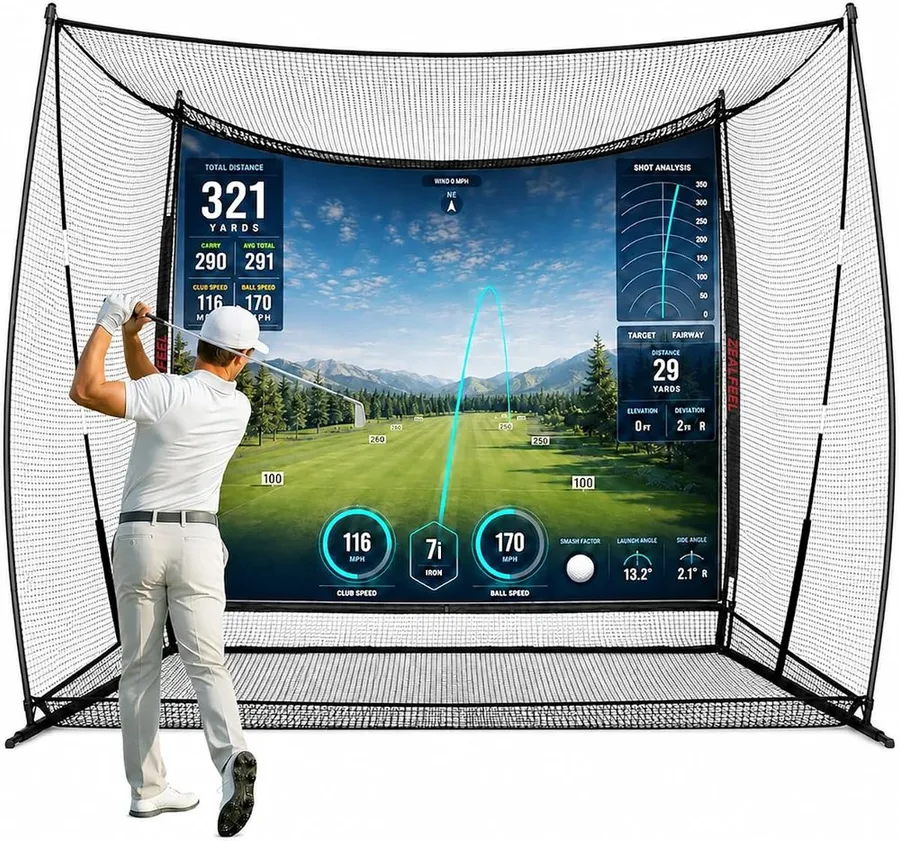
This 10x8 cage bundles a steel frame, side barriers and a dual-layer impact screen for around $200, the fastest low-cost way to get a contained hitting bay into a small room.
What we like
- Steel frame, side barriers and dual-layer screen included in one low-priced kit
- Compact 10x8 footprint fits a garage or spare room
- Side barriers catch shanks and protect surrounding walls
- Works as a standalone net or a screen for a projector
What we don't
- Its lower rating reflects a thinner screen and frame than pricier enclosures
| Component | Net cage and screen |
|---|---|
| Best for | A compact, low-cost hitting bay |
| Setup | About 40 minutes |
| Price | $200 |
| Warranty | 1 year |
| Install difficulty | Moderate |
| Price bracket | $ |
The ZEALFEEL cage takes Best Compact Setup because it packs the whole containment problem into one affordable, small-footprint kit. For around $200 you get a steel frame, side barriers and a dual-layer impact screen, which is enough to turn a corner of a garage or spare room into a bay you can hit into safely without a big build.
In everyday use its strength is simplicity and protection. The 10 by 8 foot frame does not eat a whole room, the side barriers catch the inevitable shanks before they reach a wall, and the screen doubles as a projection surface if you later add a projector and launch monitor to make it a full sim.
The honest caveat is that it earns its lower rating. The screen and frame are lighter than those on the premium enclosures here, so it is better suited to regular practice than to relentless daily driver sessions from a hard hitter.
Choose this if space and budget are your main constraints and you want containment set up quickly. If you swing hard and often, or you want the sturdiest possible bay, step up to a heavier GoSports enclosure or a full enclosure package instead.
Research-based pick: this recommendation is based on product data, owner feedback and comparison with products we have tested, not on direct hands-on testing.
Buy it if: Budget builders with a small room who want containment fast
Skip it if: You plan heavy daily driver sessions that demand a heavier-duty enclosure
Best for Scratch Builds
Blulu Golf Frame Corner Kit
by Blulu
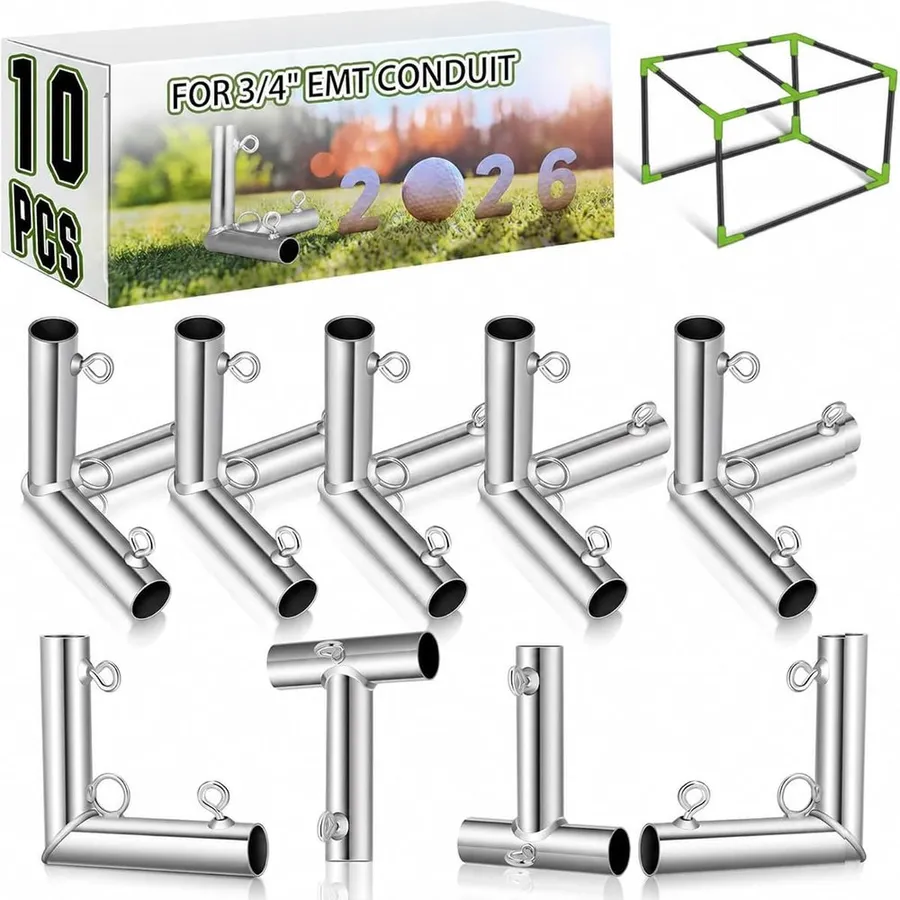
For the true DIY builder, this 10-piece corner kit turns cheap hardware-store conduit into a square, rigid 10-foot cage frame, the lowest-cost way to build an enclosure from the ground up.
What we like
- Ten corner fittings build a full 10x10x10 foot cube frame
- Uses inexpensive 3/4 inch EMT conduit you cut to any size
- Threaded eye bolts give clean tie-off points for netting or a screen
- By far the cheapest entry point to a DIY enclosure
What we don't
- You supply and cut all the conduit, netting and screen, so it is a real project, not a kit
| Component | Frame fittings (10 pieces) |
|---|---|
| Best for | Building your own cage from conduit |
| Setup | DIY assembly |
| Price | $63 |
| Warranty | None stated |
| Install difficulty | Hard |
| Price bracket | $ |
This corner kit is the pick for the builder who genuinely wants to build. It earns Best for Scratch Builds because it is the cheapest possible starting point for an enclosure: ten fittings that join lengths of standard 3/4 inch EMT conduit into a rigid 10 by 10 by 10 foot cube you can hang netting and a screen from.
The appeal is total control over size and cost. Conduit is cheap and sold at any hardware store, so you cut it to fit your exact ceiling height and wall width instead of buying a frame sized for someone else’s garage. The threaded eye bolts give you clean, solid points to tie off netting or tension a screen.
The flip side is that this is the most involved option here by a wide margin. You are sourcing and cutting the conduit, buying the netting and screen separately and assembling the whole thing yourself, so treat it as a weekend project rather than an unboxing.
Choose this if you enjoy the build and want to save money by doing the frame yourself. If the idea of measuring and cutting conduit sounds like a chore, a pre-made enclosure package with the frame poles included will get you hitting far sooner.
Research-based pick: this recommendation is based on product data, owner feedback and comparison with products we have tested, not on direct hands-on testing.
Buy it if: Hands-on builders who want to size and build a frame from raw conduit
Skip it if: You want something that arrives ready to assemble with parts included
How we researched these picks#
We built this list by starting from the parts people actually buy to build a home golf simulator, then filtering hard on evidence and relevance. Every product here is a real, currently sold item, and we prioritized ones with a meaningful base of verified owner reviews so the list reflects gear you can order and trust today rather than untested listings.
Because a DIY simulator is assembled from components, we deliberately spread the seven picks across the whole build. There is a complete enclosure package, a premium branded enclosure, a launch monitor for the data, a hitting mat, a standalone impact screen, a compact cage and a bare frame corner kit. For each one we read the manufacturer listing, compared the aggregated owner feedback and judged it head to head against rivals on how much of the job it does for you, the space it needs, build effort, durability and value.
These recommendations are research-based, not hands-on tested. We have not built each kit in our own garage, so we lean on published specifications and the consistent themes in owner reviews rather than personal range data. Where a part has a real weakness, such as a thinner screen, a subscription or the fact that it is only a shell, we say so plainly so you can budget for the rest of the build.
How to choose a DIY golf simulator (buying guide)#
Decide how much you want to build yourself. This is the first fork. A complete enclosure package hands you the screen, cage and frame in one box and just needs your tech added. A bare corner kit is the opposite: cheap conduit fittings that you cut, assemble and hang netting on yourself. Be honest about whether you want a weekend project or a quick setup, because that choice drives everything else.
Measure your space, especially ceiling height. A simulator lives or dies on room dimensions. Aim for roughly 10 feet wide and 10 feet deep, and check that you have at least 9 feet of height to swing a driver, more if you are tall. A compact 10x8 cage suits a single-car garage build, while the wider 12 and 14 foot enclosures need a dedicated bay. Ceiling height is the constraint that ends most builds, so measure it first.
Get the impact screen right. The screen takes the full force of every shot and still has to show a clean image, so it is not the place to save money. Look for a multi-layer impact screen that absorbs driver impacts quietly and projects a bright, sharp picture. If you are framing your own enclosure, a standalone screen with grommets and bungee cords lets you tension it flat on your frame.
Add a launch monitor for real data and course play. A frame and screen alone is just a net until a launch monitor feeds it numbers and a picture. A camera-and-radar launch monitor like the Rapsodo MLM2PRO reads ball and club data and plays virtual courses through an app, which is what turns a DIY enclosure into an actual simulator. Check whether the best features need a subscription and budget for that recurring cost.
Do not forget the mat and the projector. The mat is the surface you feel on every swing, so a thicker turf protects your wrists and gives a more realistic strike. You also need a projector to throw the image onto the screen and a laptop or tablet to run the software. None of these come inside an enclosure shell, so add them to your total before you compare prices.
Match durability to how hard you hit. A light 10x8 cage is fine for regular practice but will wear faster under relentless daily driver sessions. If you swing hard and often, step up to a heavier branded golf simulator enclosure with a sturdier frame and thicker screen. Pay for the build quality your usage actually demands rather than the cheapest option that technically fits.
Add up the whole stack before you buy. The single biggest DIY mistake is pricing only the enclosure and forgetting the rest. Total the shell, the launch monitor, the projector, the mat and any subscription together, then compare that against a packaged budget simulator. DIY still usually wins on price, but only once you have counted every part the finished simulator needs.
Frequently asked questions
How much does it cost to build a DIY golf simulator?
It depends how much you build yourself. A bare-bones bay using a conduit corner kit, your own netting and a budget screen can come in around $300 to $500 plus a launch monitor. A branded enclosure package runs $700 to $1,000 for the shell, and then you add a launch monitor, projector and mat on top. Adding it all up, most credible DIY sims land somewhere between $1,000 and $2,500 once the tech is included.
What parts do I actually need for a DIY golf simulator?
Five things: something to catch the ball (an enclosure or cage with an impact screen), a launch monitor to read your shots, a projector to throw the image onto the screen, a mat to hit off and a device to run the software. The kits in this guide cover the physical build, and a launch monitor like the Rapsodo MLM2PRO supplies the data and course play. A projector and a laptop or tablet complete the picture.
How much space do I need to build a golf simulator at home?
Plan for a room roughly 10 feet wide, 10 feet deep and at least 9 feet tall so you can swing a driver without hitting the ceiling, though taller golfers want closer to 10 feet of height. The compact 10x8 cages here fit a single-car garage, while the larger 12 and 14 foot enclosures need a wider bay. Always check your ceiling height first, because that is the constraint that stops most builds.
Is it cheaper to build a golf simulator or buy one?
Building is usually cheaper if you are willing to source parts and assemble them, especially at the budget end where a conduit frame and separate screen undercut any packaged system. A turnkey studio that arrives in one box and plays courses immediately costs more because you are paying for integration and convenience. The trade-off is time and effort: DIY saves money but asks you to do the work.
About the author

Jim Bennett Founder & lead reviewer
Jim is the guy behind Golf Sim Jim. He builds home golf simulators and compares launch monitors by the numbers that actually decide a setup, room fit, accuracy and software.
Home setup: Garage bay: SkyTrak+, 10 ft ceiling, BenQ LK936ST short-throw
- Launch monitor accuracy
- Home simulator builds
- Impact screens & enclosures
- Sim software (GSPro, E6, TGC)